
Test management is an integral part of the software testing life cycle. To execute the functions efficiently, many organizations use commercial and open source tools to meet their needs.
How to use TestLink
In this TestLink tutorial for beginners, we will learn how to easily set up and start using TestLink, an open source test management tool that provides core features also found in commercial tools.
What is TestLink?
TestLink is an open source tool used to track and maintain various Software Testing Life Cycle activities. As we know, it is critical for organizations to deliver quality projects on time to remain competitive. With the same concept in mind, TestLink is based on the centralized management of testing activities which includes project management, issues tracking, and any other test management activity that allows stakeholders to synchronize with test specifications and requirement specification of any project. TestLink operates under General Public License and has been developed by TeamTest. It supports all OS platforms which include Windows, Linux, and MAC, and is compatible with a range of browsers such as IE, Chrome, Mozilla Firefox, and Safari.
TestLink supports multiple user setups by assigning different roles to maintain hierarchy. Similarly, multiple projects and test suites can be created, followed by multiple test cases without limitation. One important aspect of this tool is report generation which is available in various formats. A simple configuration is also provided if you wish to integrate TestLink with other defect management tools such as JIRA, Mantis, Bugzilla, and VersionOne.
TestLink Tutorial – Test Management Tool
TestLink is useful for various activities in the testing life cycle where every stakeholder can use it according to their assigned role in the system. Test managers, business analysts, project managers and testers can each use TestLink within their own areas of responsibility. Let’s learn how to set up and then use TestLink.
TestLink Installation and Setup
TestLink is based on the client/server concept which means once the tool has been installed on the central server, the user can interact with it directly through a specific URL from any browser. Make sure the following has been installed in your system before continue using TestLink:
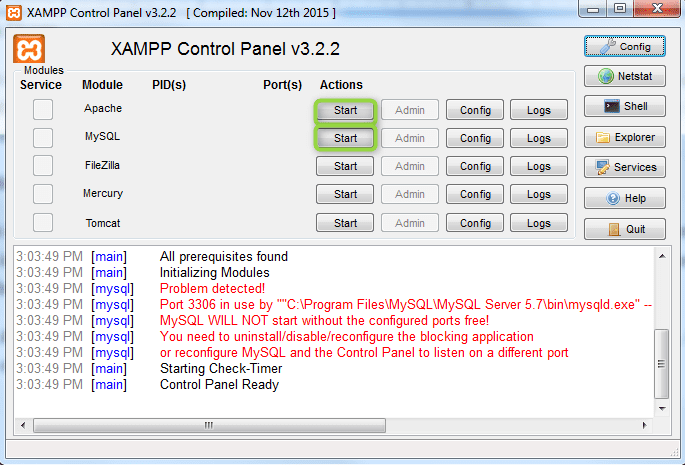
Apache web server: Apache for Windows can be downloaded and installed from here. Once installed be sure to click the Start button in the XAMPP control panel for Apache and MySQL, as shown in the below screenshot.
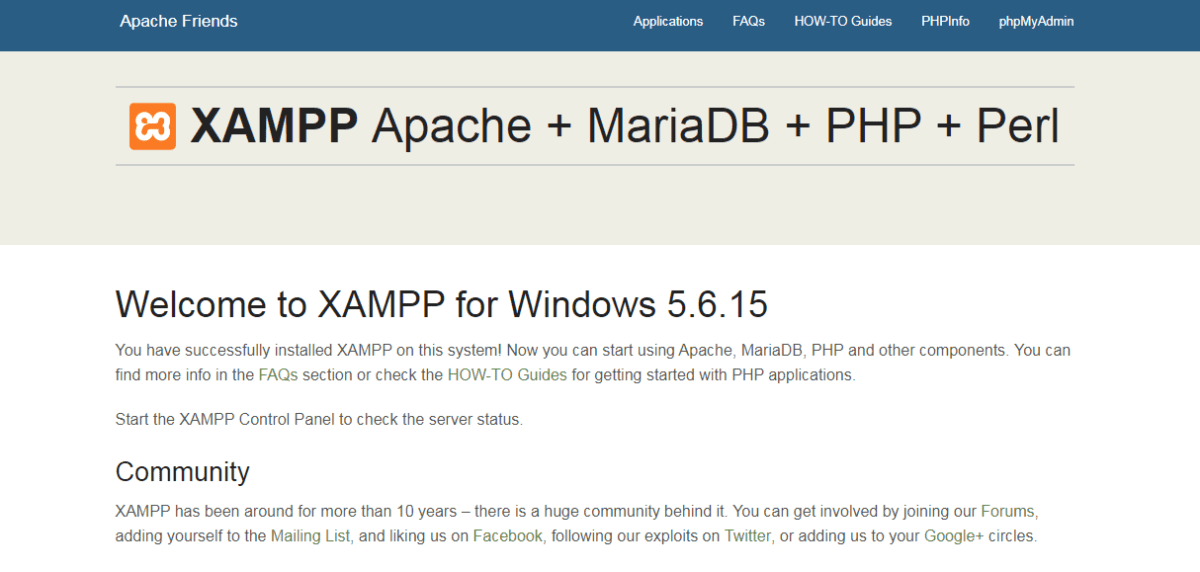
Note: To check that all prerequisites have been installed and are running properly, use the following URL in the browser to verify: https://localhost.com/. The following screen will appear.
Launching TestLink
Once XAMPP is done and running, we need to set up and configure for TestLink.
Step 1: Download a setup file from SourceForge. A zip file will be downloaded to your system.
Step 2: Unzip the downloaded file and rename it TestLink.
Step 3: Now, place the TestLink folder in the htdocs folder which can be found under XAMPP where you will find it installed.
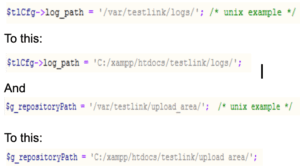
Step 4: Open the TestLink folder, locate then open the file named as config.inc.php (You can open the file with any text editor)
Step 5: Update following paths in the file:
To verify the changes, use the URL: http://localhost/Testlink/
Step 6: Click on the New Installation as shown in the screenshot below:

Step 7: Accept the Terms and Conditions, then click on the Continue button. A new screen will appear and you will have to click on Continue again. See the below screenshot.
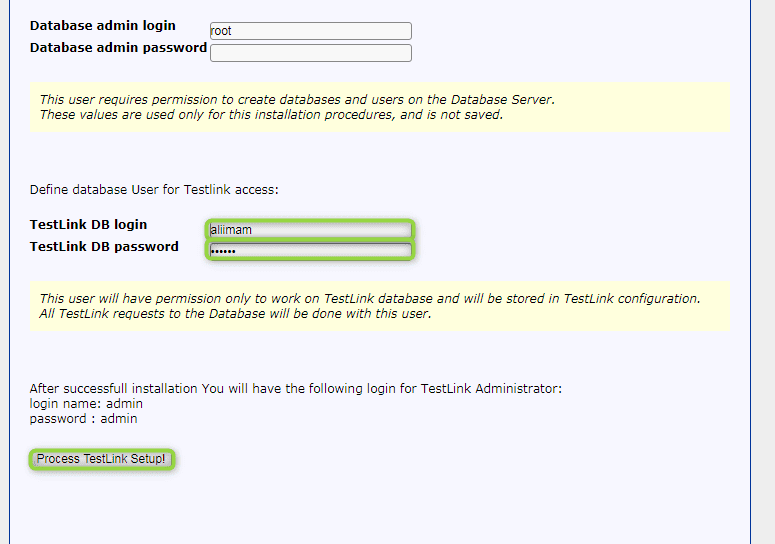
Step 8: In the fields shown, set your credentials for Database Admin and Password. Similarly, a TestLink login/password is required followed by clicking the button in the end. Default login for database name is root.
Once the installation is successful, the following screen will appear.
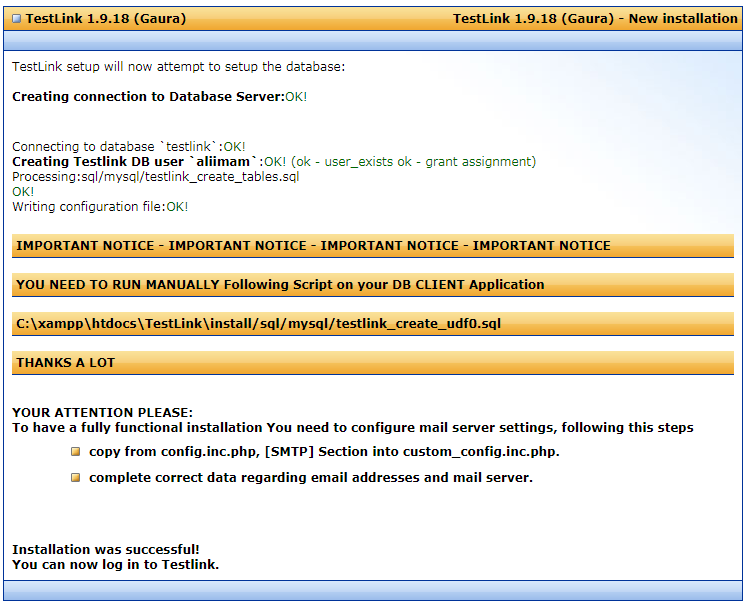
With the installation now complete, you can now start using TestLink by navigating the URL http://localhost/testlink/ and using ‘admin’ as the default credential for both username and password.

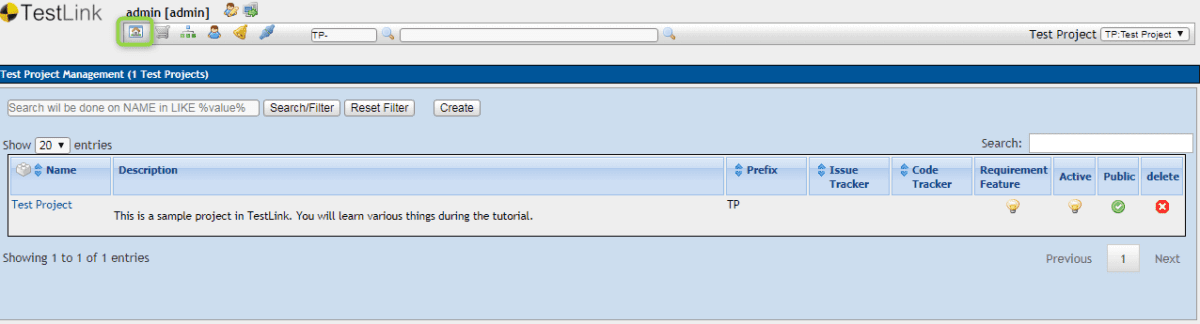
Setting up a Project
Once a new project has been created for a specific purpose, it will then have test plans, test suites, and test cases. To create a new project, admin access is necessary. When you logged in for the first time as admin, you will have landed on the project creation page.
Step(s): You will see a form as shown in the screenshot below. Fill it out and click on the Create button to proceed.
- Provide a unique name for the project
- The prefix will be used for the identification of test cases
- Select checkboxes according to the requirements of the project

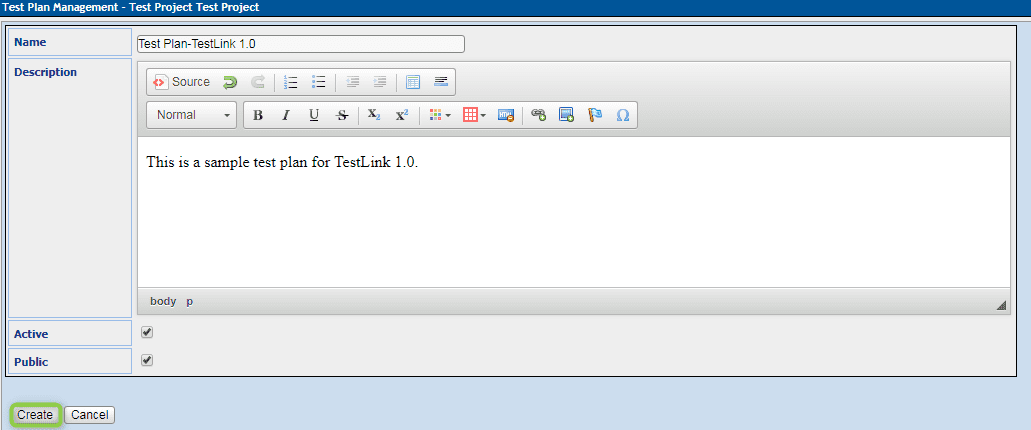
Creating a Test Plan
As we know, test planning is important for any project. It needs to contain all activities related to testing such as scope, milestones, test suites, and test cases. Before creating a test plan, we need to consider the following steps.
Step 1: Navigate to the Desktop page by clicking on the icon in the top bar as shown in the screenshot below.
Step 2: Once a new page is loaded, you can see a Test Plan Management option on the right side of the page. A new page will appear with a button ‘Create’, you have to click that.

Step 3: Provide information in the fields and click on the Create button at the bottom to finish creating a test plan.
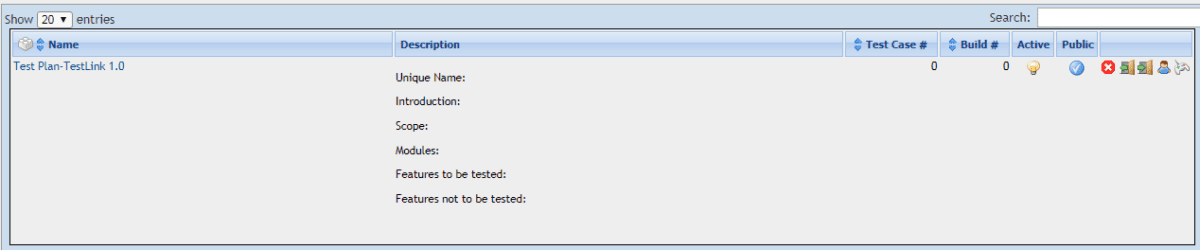
You can edit and delete a test plan.
How to Create a Build
Before we create a build in TestLink, we have to create permission for Builds. There are few steps to follow.
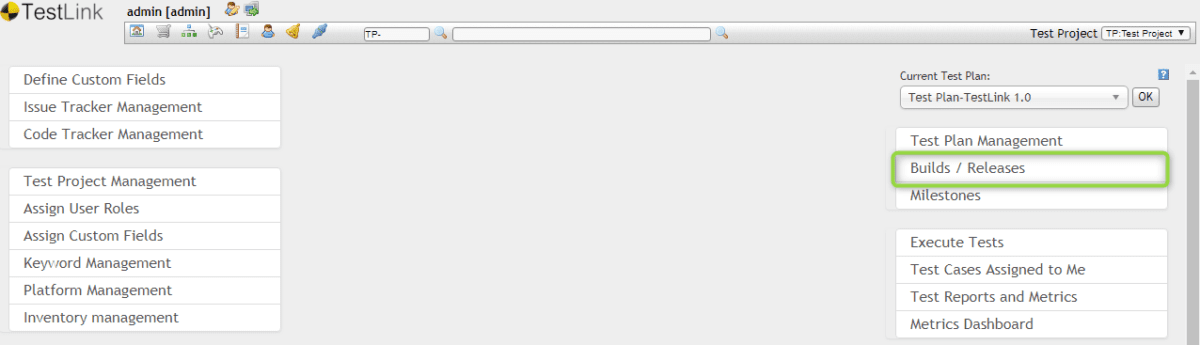
Step 1: Click on Builds/Releases option in the right side of the dashboard as shown in the screenshot below.
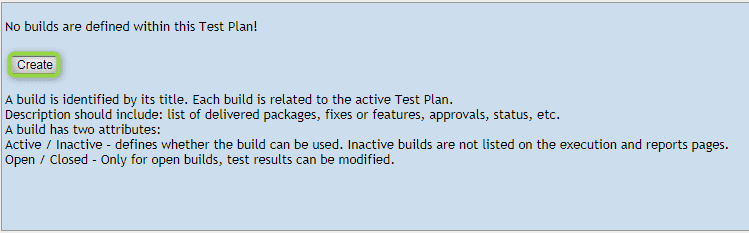
A new screen will appear, asking you to click on the button ‘Create’.
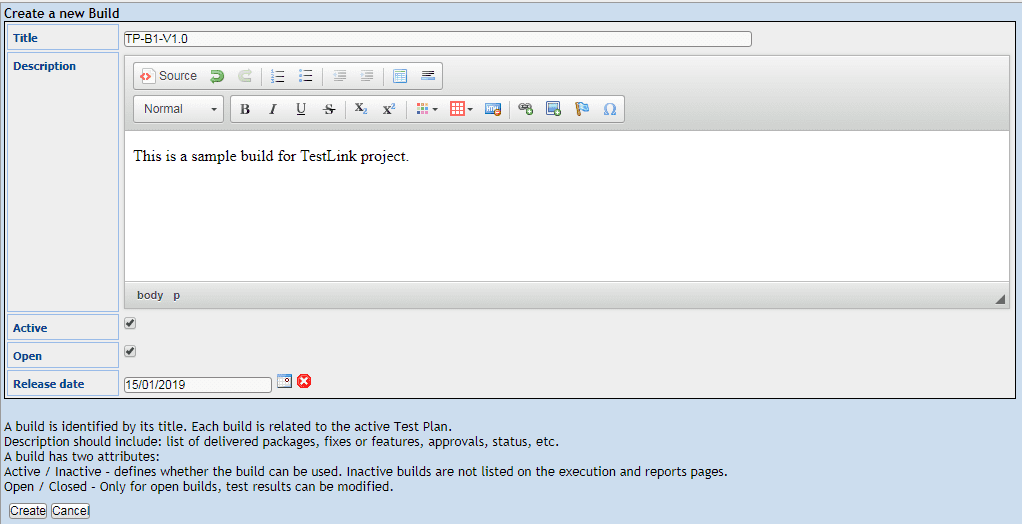
Step 2: Provide the necessary details and click on the ‘Create’ button at the bottom to successfully create a build.
- The build should have a unique title.
- There are two attributes: active and inactive. Active is set by default, and defines whether the build can be used or not. When we select inactive build, then these will not be listed anywhere on reports or execution pages.
- A release date is a future date when the build will be released.
- The build can be edited and deleted as well.
Test Suite Management Documentation
For validating functionalities within a project, there are certain test cases to execute. All these test cases are part of test suites, which is helpful to testers organizing the test activities, as well as giving insight on the current execution status.
To create a test suite in TestLink, go through the following steps.
Step 1: Click on the ‘Test Specification’ option in the bottom left of the screen on the dashboard. Upon clicking the option, the following screen will appear.
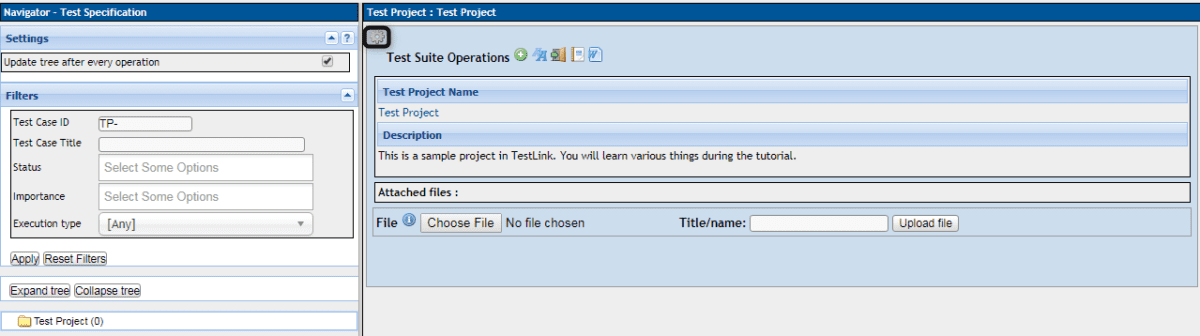
Click on the icon that has been marked in black above in the screen, as it will show you various operations to perform. Once you have taken a look, click on the (+) icon to the right of the words ‘Test Suite Operations’.
Step 2: Fill all the necessary information and click on ‘Save’ button.
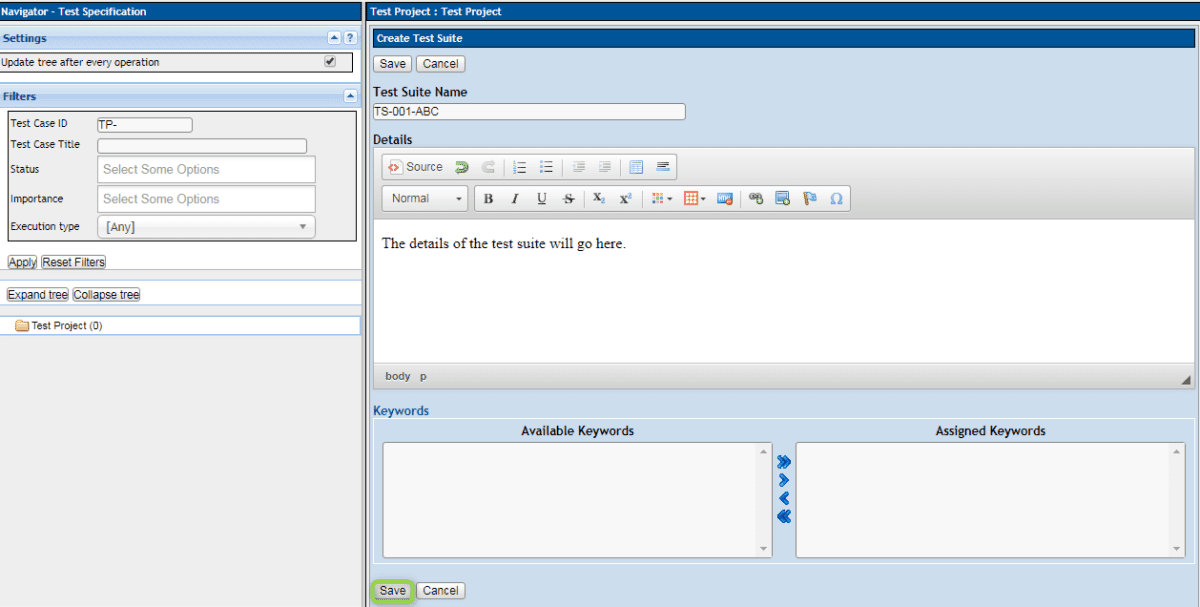
When this has been done, a tree-like structure will be created in the right panel of the screen. We can add multiple subordinates under the same test suite, which can also edited and deleted.
How to execute Test Cases in TestLink
A test case is a step or sequence that sets out the given requirements of a certain scenario. It will have preconditions, test data, expected and actual results, etc. In order to create and manage test cases in TestLink, we have to follow the steps below.
Step 1: As with step 1 of the test suite, navigate to Test Specification and click on the option as shown below (TS-001-ABC).

Step 2: Click on the settings icon which is marked in black and it will open two options beneath it. Click on the (+) icon to the right of the words ‘Test Case Operations’.
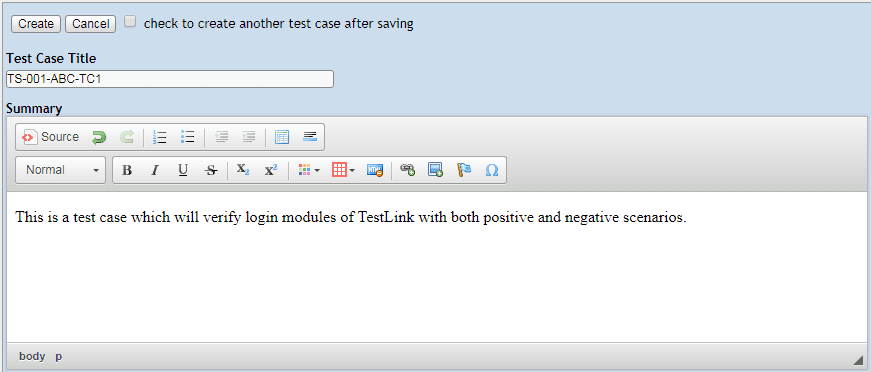
Step 3: Fill out all the necessary information and click on ‘Create’ button in the form.
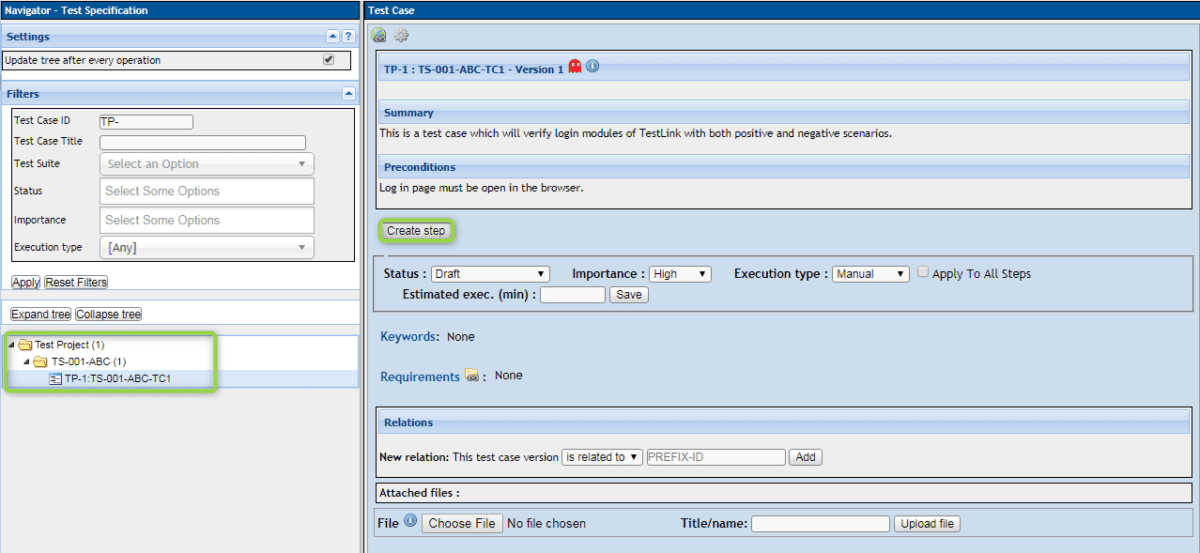
Once the test case has been created, you will be able to see the tree structure on the left side of the panel which has the test case under the test suite. Test cases can be edited and deleted as required, and testers can easily create further steps for more efficiency by clicking the ‘Create Step’ button.
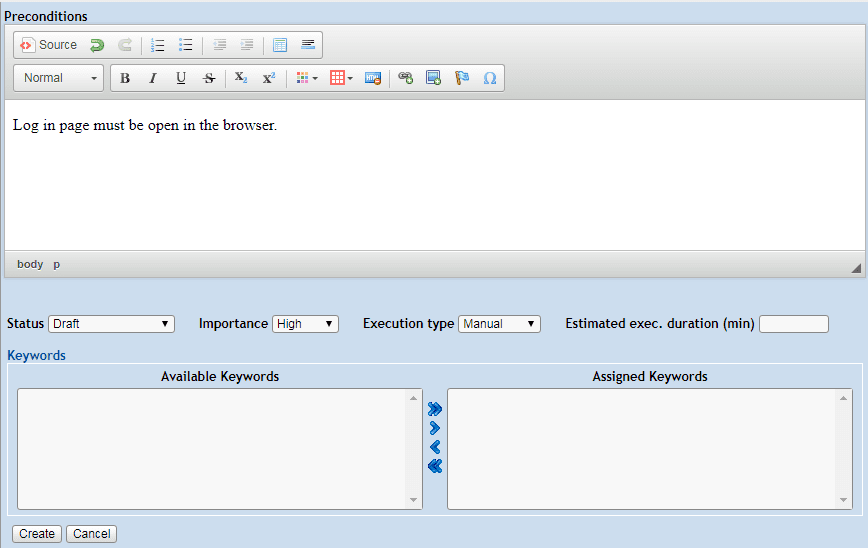
You can then provide necessary information and click on ‘Create’ button at the bottom as shown in the below screenshot. It will link the steps with the respective test case.
How to Create Users and Assign Roles Tutorial
This section of the tutorial deals with the different roles in TestLink, and how you can create them according to the project requirements. Before we dive in further, let us look at the default roles which TestLink offers.
- Guest: A guest cannot edit, but only view test cases and metrics.
- Tester: A tester only has access to execute test cases and view test metrics.
- Senior Tester: A senior tester can view, create, modify, and delete test cases as needed. Similar to a regular tester role, a senior tester can execute test cases and can view test metrics. The senior tester role cannot create test cases in TestLink.
- Test Lead (Leader) & Admin: These roles can perform all major functionalities such as creating a test plan and build, and are able to alter them at any stage. They can also execute test cases, and assign roles to users along with permissions.
The following section shows how to create a user and assign permissions.
Step 1: Click on the User icon in the navigation bar as shown below. A new page will open.
![]()
Step 2: Click the ‘Create’ button present on that page.
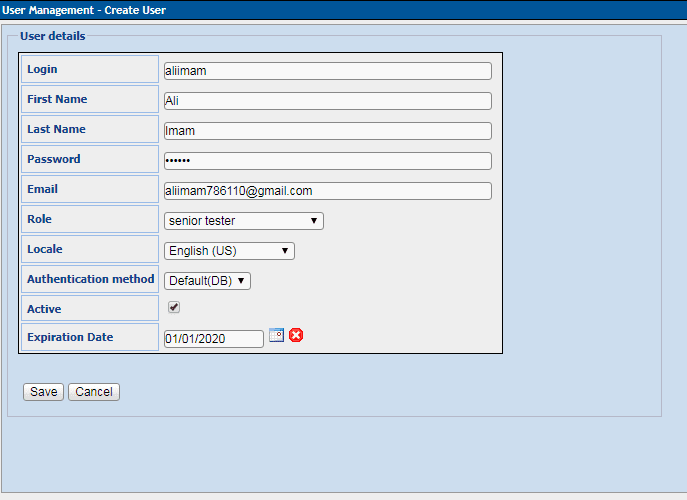
Step 3: Enter all required details on the form.
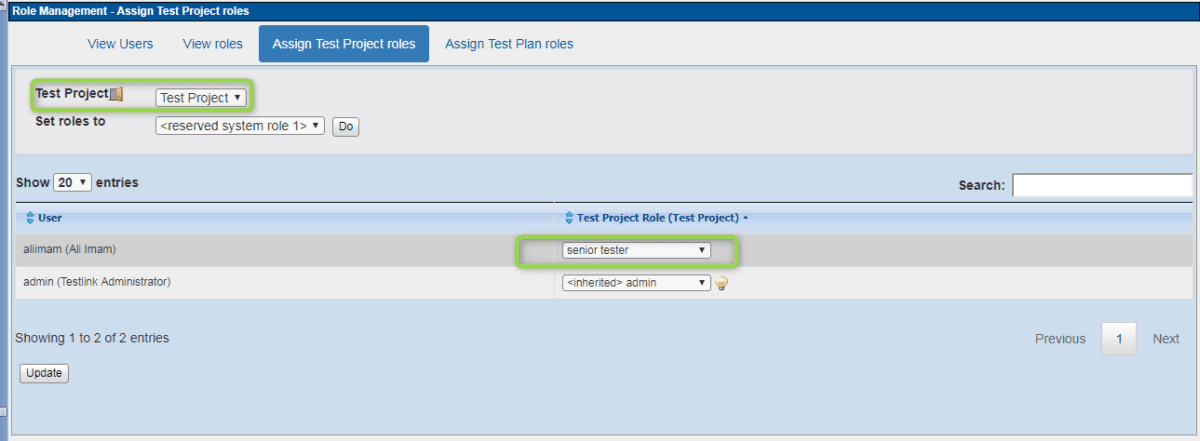
Step 4: As a new user is created, you can now assign a project to that particular user. To do so, click on the tab ‘Assign Test Project roles’.
Step 5: Select a project name and assign a role to that user, then click the ‘Update’ button present on that page, as shown in the picture below.
Writing Requirements in TestLink
A requirement details qualities that a function should possess in order to perform as envisioned. In TestLink, requirements can be easily added, then linked to test cases.
Step 1: Click on the ‘Requirements’ icon in the navigational tab as shown in the picture.
![]()
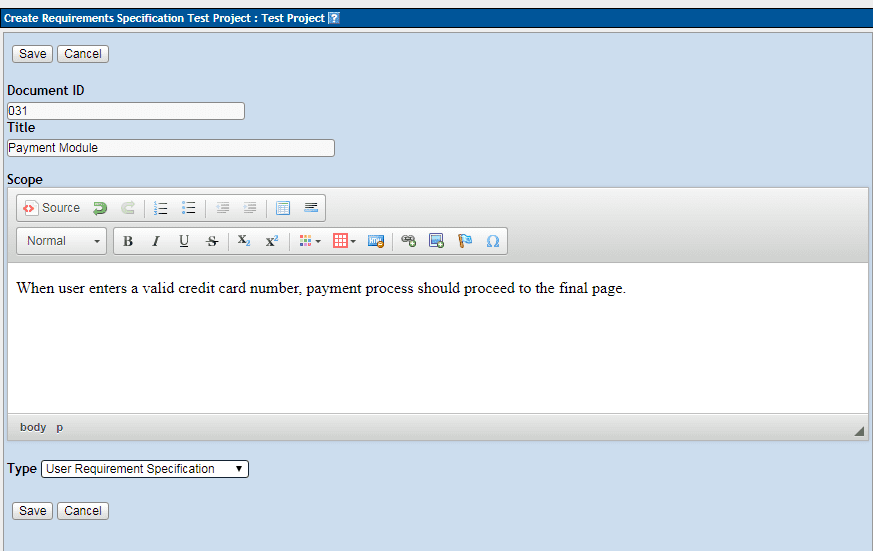
Step 2: A new page will open. Click on ‘Create’ button.
Step 3: Fill out the form with the necessary information and click on ‘Save’ button.
Assigning the Requirements to Test Case(s)
One of the important activities for the test team is to track test coverage so that no requirements can be missed. In TestLink, one can link the requirements to the test cases by following few of the below steps.
Step 1: Navigate to ‘Test Specification’ section and open an existing test case.
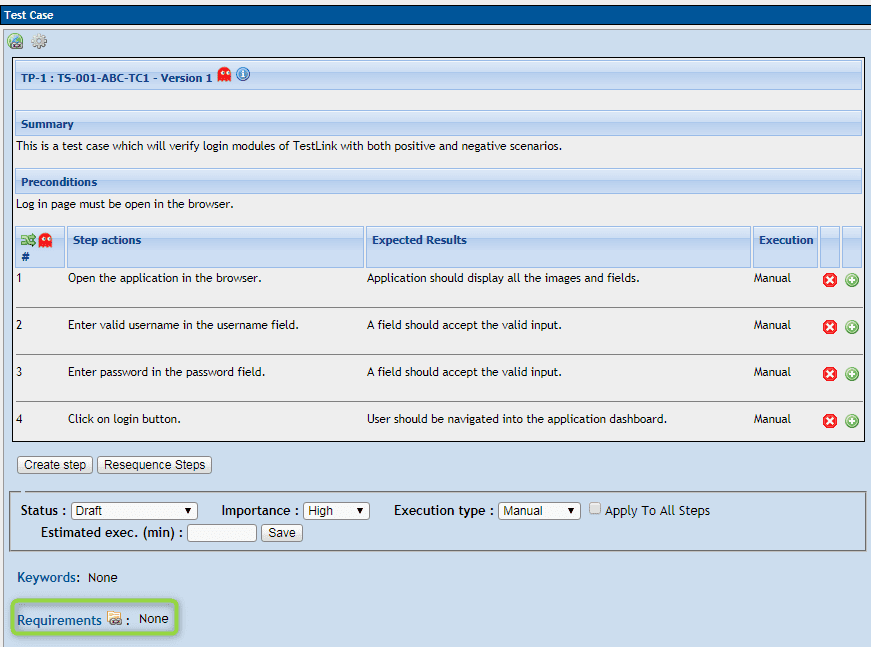
Step 2: As you can see in the above screenshot, a ‘Requirement’ button is present along with an icon. You have to click that file icon button in order to link the test cases with the requirements. A dialogue box will then appear.
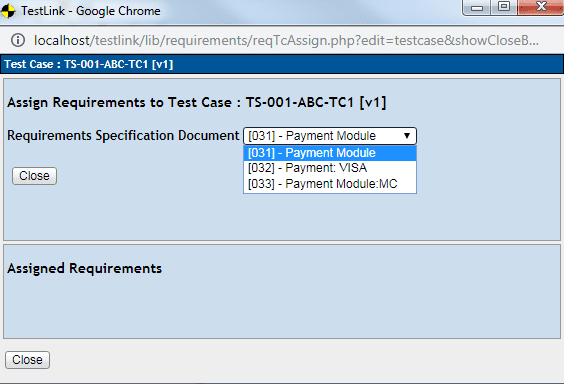
Step 3: After selecting your chosen requirements, click the ‘Assign’ button and the operation will be executed successfully.
Finally
In this tutorial we have learned the entire TestLink installation process, followed by core functionalities of the tool which include creating of a project, test suites, test plan, build, and test cases. There are other great features to use after setup such as easily generating test reports in various formats to keep track of progress, and you can export and import test suites and test cases to and from other projects. Because of its usefulness, TestLink is considered one of the most popular and widely used test management tools available today.